
Here’s a quick update to this mini-tutorial. Previous parts can be found here and here.
Installing MySQL
Installing MySQL is so simple that I don’t need to hide it behind the cut. The one in the Ubuntu repositories work just fine:
$ sudo apt-get install mysql-server-5.1
Note that you will be asked to enter a root password somewhere in the installation.
To wrap up the installation run
$ sudo mysql_install_db
to initialize the installed server and
$ sudo mysql_secure_installation
to secure it.
In mysql_secure_installation, you’ll be asked for your root password and then you’ll asked if you want to change it. Just enter “n” since there’s no reason to change it this early. Then you’ll be asked if you want to do some things to secure the database which is, of course, what we want to do so just hit Enter for each question to choose the default answer (“Y”).
Installing WordPress
Now we go to making our Ubuntu + nginx + PHP + MySQL setup more useful by installing a web app. I choose WordPress for this tutorial because it’s both popular and easy to install.
Note that most PHP web apps out there have similar installation steps i.e. install prerequisites, setup database, download and extract files, and configure the app.
Installing prerequisites
We only need to install a few extra components for WordPress to work on our box:
$ sudo apt-get install php5-mysql php5-gd
php5-mysql is obviously required to allow PHP to connect to MySQL. php5-gd may be needed if you’re uploading images inside WordPress instead of using an external hosting.
At this point we are ready to follow the Installing WordPress guide.
Creating the database
I’ve switched around steps 1 and 2 because I prefer to do file-related tasks together instead of jumping from files to database to files again.
In setting up the database, we go with the client guide. Creating a new user isn’t part of that guide, though, so we’ll have to do that too.
Connect to the database using the root user:
$ mysql -u root -p
You will be prompted for the password before you can proceed. Once in, you can now proceed with doing what you need to do. The following lines will create a database named wp and a user named wp_user whose password is password_here.
mysql> CREATE DATABASE wp;

mysql> CREATE USER wp_user;

mysql> SET PASSWORD FOR wp_user = PASSWORD("password_here");

mysql> GRANT ALL PRIVILEGES ON wp.* TO "wp_user"@"localhost" IDENTIFIED BY "password_here";

mysql> FLUSH PRIVILEGES;

mysql> EXIT
Downloading WordPress and moving it around
Now it’s time to proceed with steps 1 and 3. Use wget to download and extract the latest version of WordPress:
$ wget http://wordpress.org/latest.tar.gz

$ tar -zxvf latest.tar.gz
We’ll then move the extracted folder wordpress/ to /var/www/ to centralize our web-app stuff.
$ sudo mv wordpress /var/www/
We also need to change the ownership for the folder:
$ sudo chown -R www-data:www-data /var/www/wordpress
Configuring it to work
First we need to add our database settings to wp-config.php:
$ cd /var/www/wordpress

/var/www/wordpress$ sudo mv wp-config-sample.php wp-config.php

/var/www/wordpress$ sudo vim wp-config.php
Change the settings as follows:
// ** MySQL settings - You can get this info from your web host ** //
/** The name of the database for WordPress */
define('DB_NAME', 'wp');

/** MySQL database username */
define('DB_USER', 'wp_user');

/** MySQL database password */
define('DB_PASSWORD', 'password_here');
Now to edit our nginx settings.
$ sudo vim /etc/nginx/nginx.conf
We’ll be using a combination of suggested settings from both nginx and WordPress documents:
...
    server {
        listen       80;
        server_name *.mysite.dev;
        root /var/www/wordpress;

        if ($http_host != "mysite.dev") {
                rewrite ^ http://mysite.dev$request_uri permanent;
        }

        # Deny all attempts to access hidden files such as .htaccess, .htpasswd, .DS_Store (Mac).
        location ~ /\. {
                deny all;
                access_log off;
                log_not_found off;
        }

        location = /favicon.ico {
                log_not_found off;
                access_log off;
        }

        location = /robots.txt {
                allow all;
                log_not_found off;
                access_log off;
        }

        location / {
                # This is cool because no php is touched for static content
                try_files $uri $uri/ /index.php;
        }

        location ~ \.php$ {
                include fastcgi_params;
                fastcgi_index index.php;
                fastcgi_param SCRIPT_FILENAME $document_root$fastcgi_script_name;
                fastcgi_pass php;
        }

        location ~* \.(js|css|png|jpg|jpeg|gif|ico)$ {
                expires max;
                log_not_found off;
        }
    }
}
The main changes here are the update to the root (pointing it now to /var/www/wordpress) and the try_files approach of URL rewriting (which allows nginx to act like mod_rewrite without the use of .htaccess).
Wrapping up
Restart both PHP-FPM and nginx to apply the changes we made to both.
$ sudo /etc/init.d/php5-fpm restart

$ sudo /etc/init.d/nginx restart
Then go to http://mysite.dev to proceed with the “famous 5-minute install”.
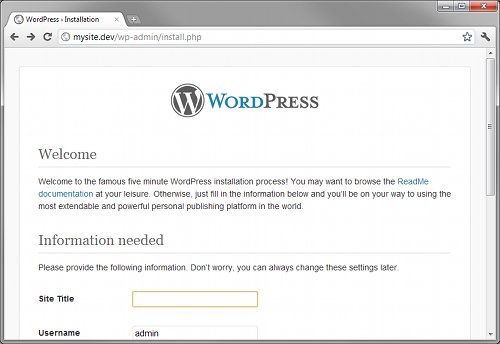
You have now successfully installed WordPress.
I Really delighted in your web journal. I just bookmarked it. I am a customary guest of your site I will impart It to my companions.