
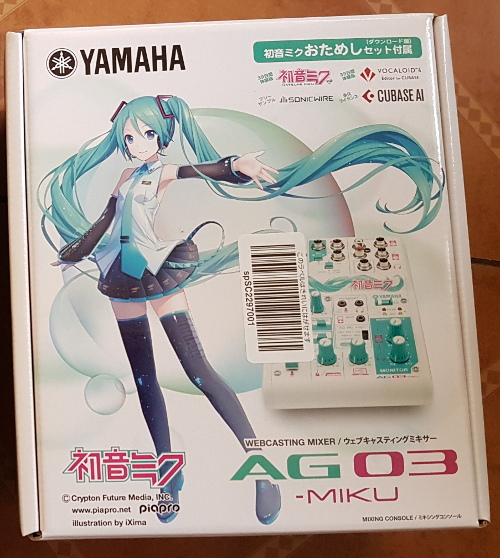
Riding on the bandwagon of people going out of retirement for Hatsune Miku‘s 10th birthday, I’m breaking my 2 year writing hiatus to write a review of the only Vocaloid merchandise I own – the Yamaha AG03-MIKU 3 channel audio mixing console.
Before we go into the review, a quick background on how I got to buy the device in the first place.
With the more stable income from my new job, I went on to upgrade the stuff I use everyday. Of course, upgrading my gaming rig was the first on the list, but a year on, there wasn’t really any new stuff I need to upgrade.
Then I saw this video, specifically the part on audio equipment.
My setup then wasn’t bad – I’ve still got a decent Samson Go Mic USB condenser mic that I used way back for voice overs and other recording stuff. But it was getting close to Christmas and I had to spend a part of my bonus on something that I would actually use rather than spend on some other, more impractical impulse buy.
Mic was no problem – Audiophile sells legit Shure SM58s. The problem was USB audio interfaces.
Dedicated audio interfaces like those from PreSonus were too unitask-y for me, not to mention their huge markups from local sellers. For a couple of months, I had resigned myself to getting an the only “cheap” device I could find locally online: okay-ish Behringer mixers with USB out which go for ₱5-₱12K.
Then I remembered Game Grumps once made a video about their setup and revealed they were using a Yamaha mixer/USB interface, specifically the Yamaha MG12XU. This got me looking into locally sold Yamaha mixers, and in the process found out that they were selling hobbyist versions of their mixers – the AG Series.
But that was shut down when I found out that the this line wasn’t even on the local distributor’s radar. International shipping would also push the cost to > ₱10K. So back to Behringer again…
That is, until a random morning when I was searching for similar options to the AG series when I found out about the special edition AG03-MIKU – a Hatsune Miku themed AG03 promoted for webcasting. The cross promotion makes sense as Yamaha built the Vocaloid software, and without Crypton Future Media‘s Miku, Vocaloid wouldn’t have been as popular as it had been in the past decade. This tie-up also gives opportunities for aspiring producers and singers to make more Vocaloid material, benefiting both.
At first I dismissed it – the first page of search results for AG03-MIKU back then showed only Japanese stores (which are hard to navigate and probably don’t ship internationally) and Ebay listings with huge markups.
Then I stumbled upon Amazon.co.jp.
Ok, so Amazon Japan sells AG03-MIKU. But surely it’s more expensive than the plain AG03, right?
And they also offer international shipping. All in all, it only costs around ₱8K (₱6K for the item, ₱2K for the priority shipping), well under the ₱10K customs duty-free limit.
(Note: I still had to pay a deposit for the expected ~30% customs fee, but they refunded it later.)
And so I impulse bought yet another device that I may not use that often. I mean, it’s a well reviewed device (it’s essentially an AG03 with a Miku decal and a more vibrant Miku color scheme) and it ups my geek cred (Vocaloid is popular, but not quite poser-geek mainstream yet), but it’s got a limited use case i.e. to replace my old microphone with a setup that is 5 times more expensive in situations that only happen at most once a month.
Was it worth it?
Hell yeah.
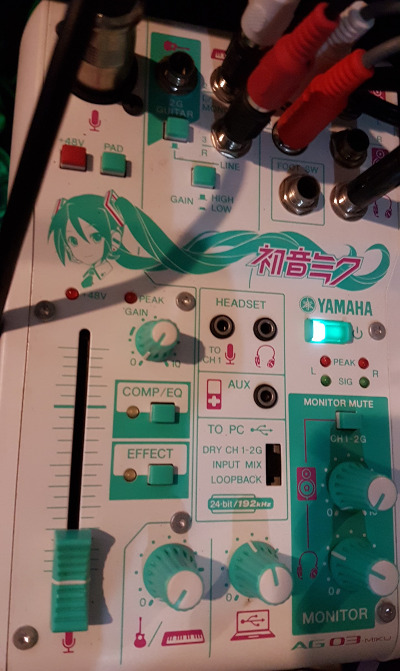
Let’s start this review with the features that I bought it for: the mic input and the USB interface.
Unfortunately, there isn’t much to say about them. The mic input accepts both XLR and 1/4″ phone connectors in a combo socket, and supports phantom power for condenser mics in case I would like to upgrade/switch to AT2020. Without boring you about technical details, all the other knobs (like the gain/level) and buttons (like the PAD, COMP/EQ, EFFECT) all allow you to adjust the mic input to make you sound better, and they do their job fairly well.
The USB audio interface is just another (albeit very high quality) audio interface. Install the drivers and plug it in and it works. I can now use an XLR mic for Skype calls, game stream voice over, and karaoke sessions alone in my room.
An expensive, occasionally used setup. A perfect example of a self-Christmas gift.
At least until I noticed this thing:
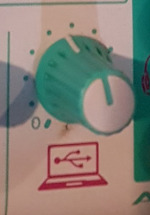
When you plug in the mixer and install the drivers, your computer can also treat it as playback device. That audio interface goes both ways, and this knob controls the volume of the sound input from your computer, and output it to the monitor headphones and/or speakers.
In other words, I accidentally bought a DAC, something that was also on my wish list. And trying it with my other Christmas self-gift an HD 600, the headphone output is powerful enough to drive the mid-to-high range headphones. So it’s also an amp, giving me a budget DAC/Amp for free!
Headphones also lead us to the feature I use the most: the monitor knobs.

With these, I can adjust the volume of my speakers and my headphones independently. Having an analog knob for quick volume fine tuning is already a big thing, but that’s not the biggest use for me: it’s switching between speakers and headphones on the fly.
I have wide soft ears and I can’t wear headphones all the time. Even the lightweight HD 600 can become annoying after a while. So my default is lower quality speakers (I haven’t upgraded yet to studio monitors) when I’m just watching Youtube videos or quick games, and I used to switch to headphones when I’m listening to music or gaming seriously via the Windows audio settings. It’s a lot easier in Windows 10, but it doesn’t beat two quick flicks of knobs.
And finally, the last feature that I got to use extensively: the other 2 input channels.
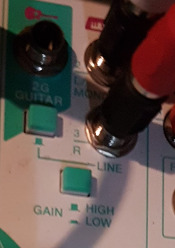
Normally, a producer would use those two channels for musical instruments. I don’t know any instruments, but I found a good use for them: external audio input.
With 1/4″ to RCA adapters, I can connect the mixer to one of my karaoke machines. And with a 3.5mm TRS to RCA adapter, I can connect my PS4 (via the controller), my 3DS, and basically any device with audio to the mixer. Once connected, I can also adjust their volumes with the knob, saving myself the hassle of having to go to their respective volume settings and adjusting them.
—
Before we move on to the other features, let’s talk about the back connectors.

The USB type-B plug on the right is the main connector. It’s just USB 2.0 connection, but it’s more than enough to transfer audio at it’s maximum sample rate while at the same time powering the device.
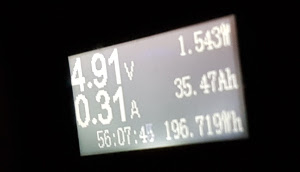
A quick check shows the mixer draws 1.5W while playing music and picking up audio, lower the max draw in the specs (2.5W).
Thanks to its low power draw, you have a portable mixing setup by powering it using a power bank and a micro-USB cable connected to the socket on the left.
(I actually did this in a Christmas party where they had a “bring your musical instrument for the jamming session”. As a vocalist, a mic with a preamp + mixer is my “instrument”. The end result was much better than I expected.)
With the correct cable and software, you can also use the type-B socket to plug in your iPad and record a jamming session. But I don’t have the proper cable and I’d rather use a laptop for it anyway.
—
Now on to the features I don’t use.
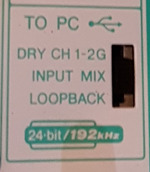
This toggles how the device mixes the audio. The Dry sends the audio from the channels dry (ie. not mixed and not affected by the volume level setting), Input Mix sends the mixed audio that you hear in the monitors sans the computer sound, while Loopback also mixes in the computer sound (everything you hear in the monitors is looped back so it’s more accurate, but may cause feedback in some software/setups). I generally just leave this in Input Mix or Loopback.
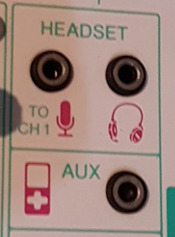
You can use the first 2 sockets you have a headset with mic that have split connectors, and you can use the last socket for input from any audio device. I don’t use these sockets because the other sockets can do the same and are better – the headset sockets are inferior to XLR in and monitor outputs, and the you have no knob to control the AUX volume and it is just line level.
I also don’t use the bundled and downloadable software. Sure there’s the Cubase AI audio software license and the 39 day license (a Miku pun for the uninitiated) for Vocaloid and Miku, but my audio software is enough for my needs right now. Then there’s the software to setup COMP/EQ and sound effects which I just set to presets (COMP/EQ for male vocalists, hall echo effect).
The only software I had to tweak was the USB driver to lower the sample rate (192kHz is overkill) which also reduces the latency (it’s impossible to sing when latency is too high, but that’s for another article).
—
Final verdict:
It is what it is, a webcasting starter kit. Pair it with decent mics, instruments, and musical talent and you’re now ready for YouTube / NND. Pair it with OBS and a console or gaming rig, and you’re set to be a Twitch streamer. And if you don’t have a DAC yet and want clean sound, it can easily fill in for one.
That said, it’s a jack of all trades, and it carries the usual drawbacks. For example, if you’re just in it for voice over work, it would be better to find a cheap audio interface or a decent second-hand interface. You can also get mixers with > 6 channels for far less than ₱8K if you just want a mixer. And if you want really good DAC/Amps, you can get much better ones for a few thousand Pesos more.
Overall, I’d recommend this product. Just go with the plain AG06 if you don’t want to look like a weeaboo.
